Projects Overview
The Projects page is the main list view for managing available project records. It gives you search, mode filtering, row actions, archive navigation, project creation, and domain-related actions for each project row.
What You Manage Here
- Active project records under
Project - Archived project records under
Archived Project - Search by project name
- Filter by mode
- Create a new project
- Open project-specific actions from the action column
- Configure a project domain from the action column
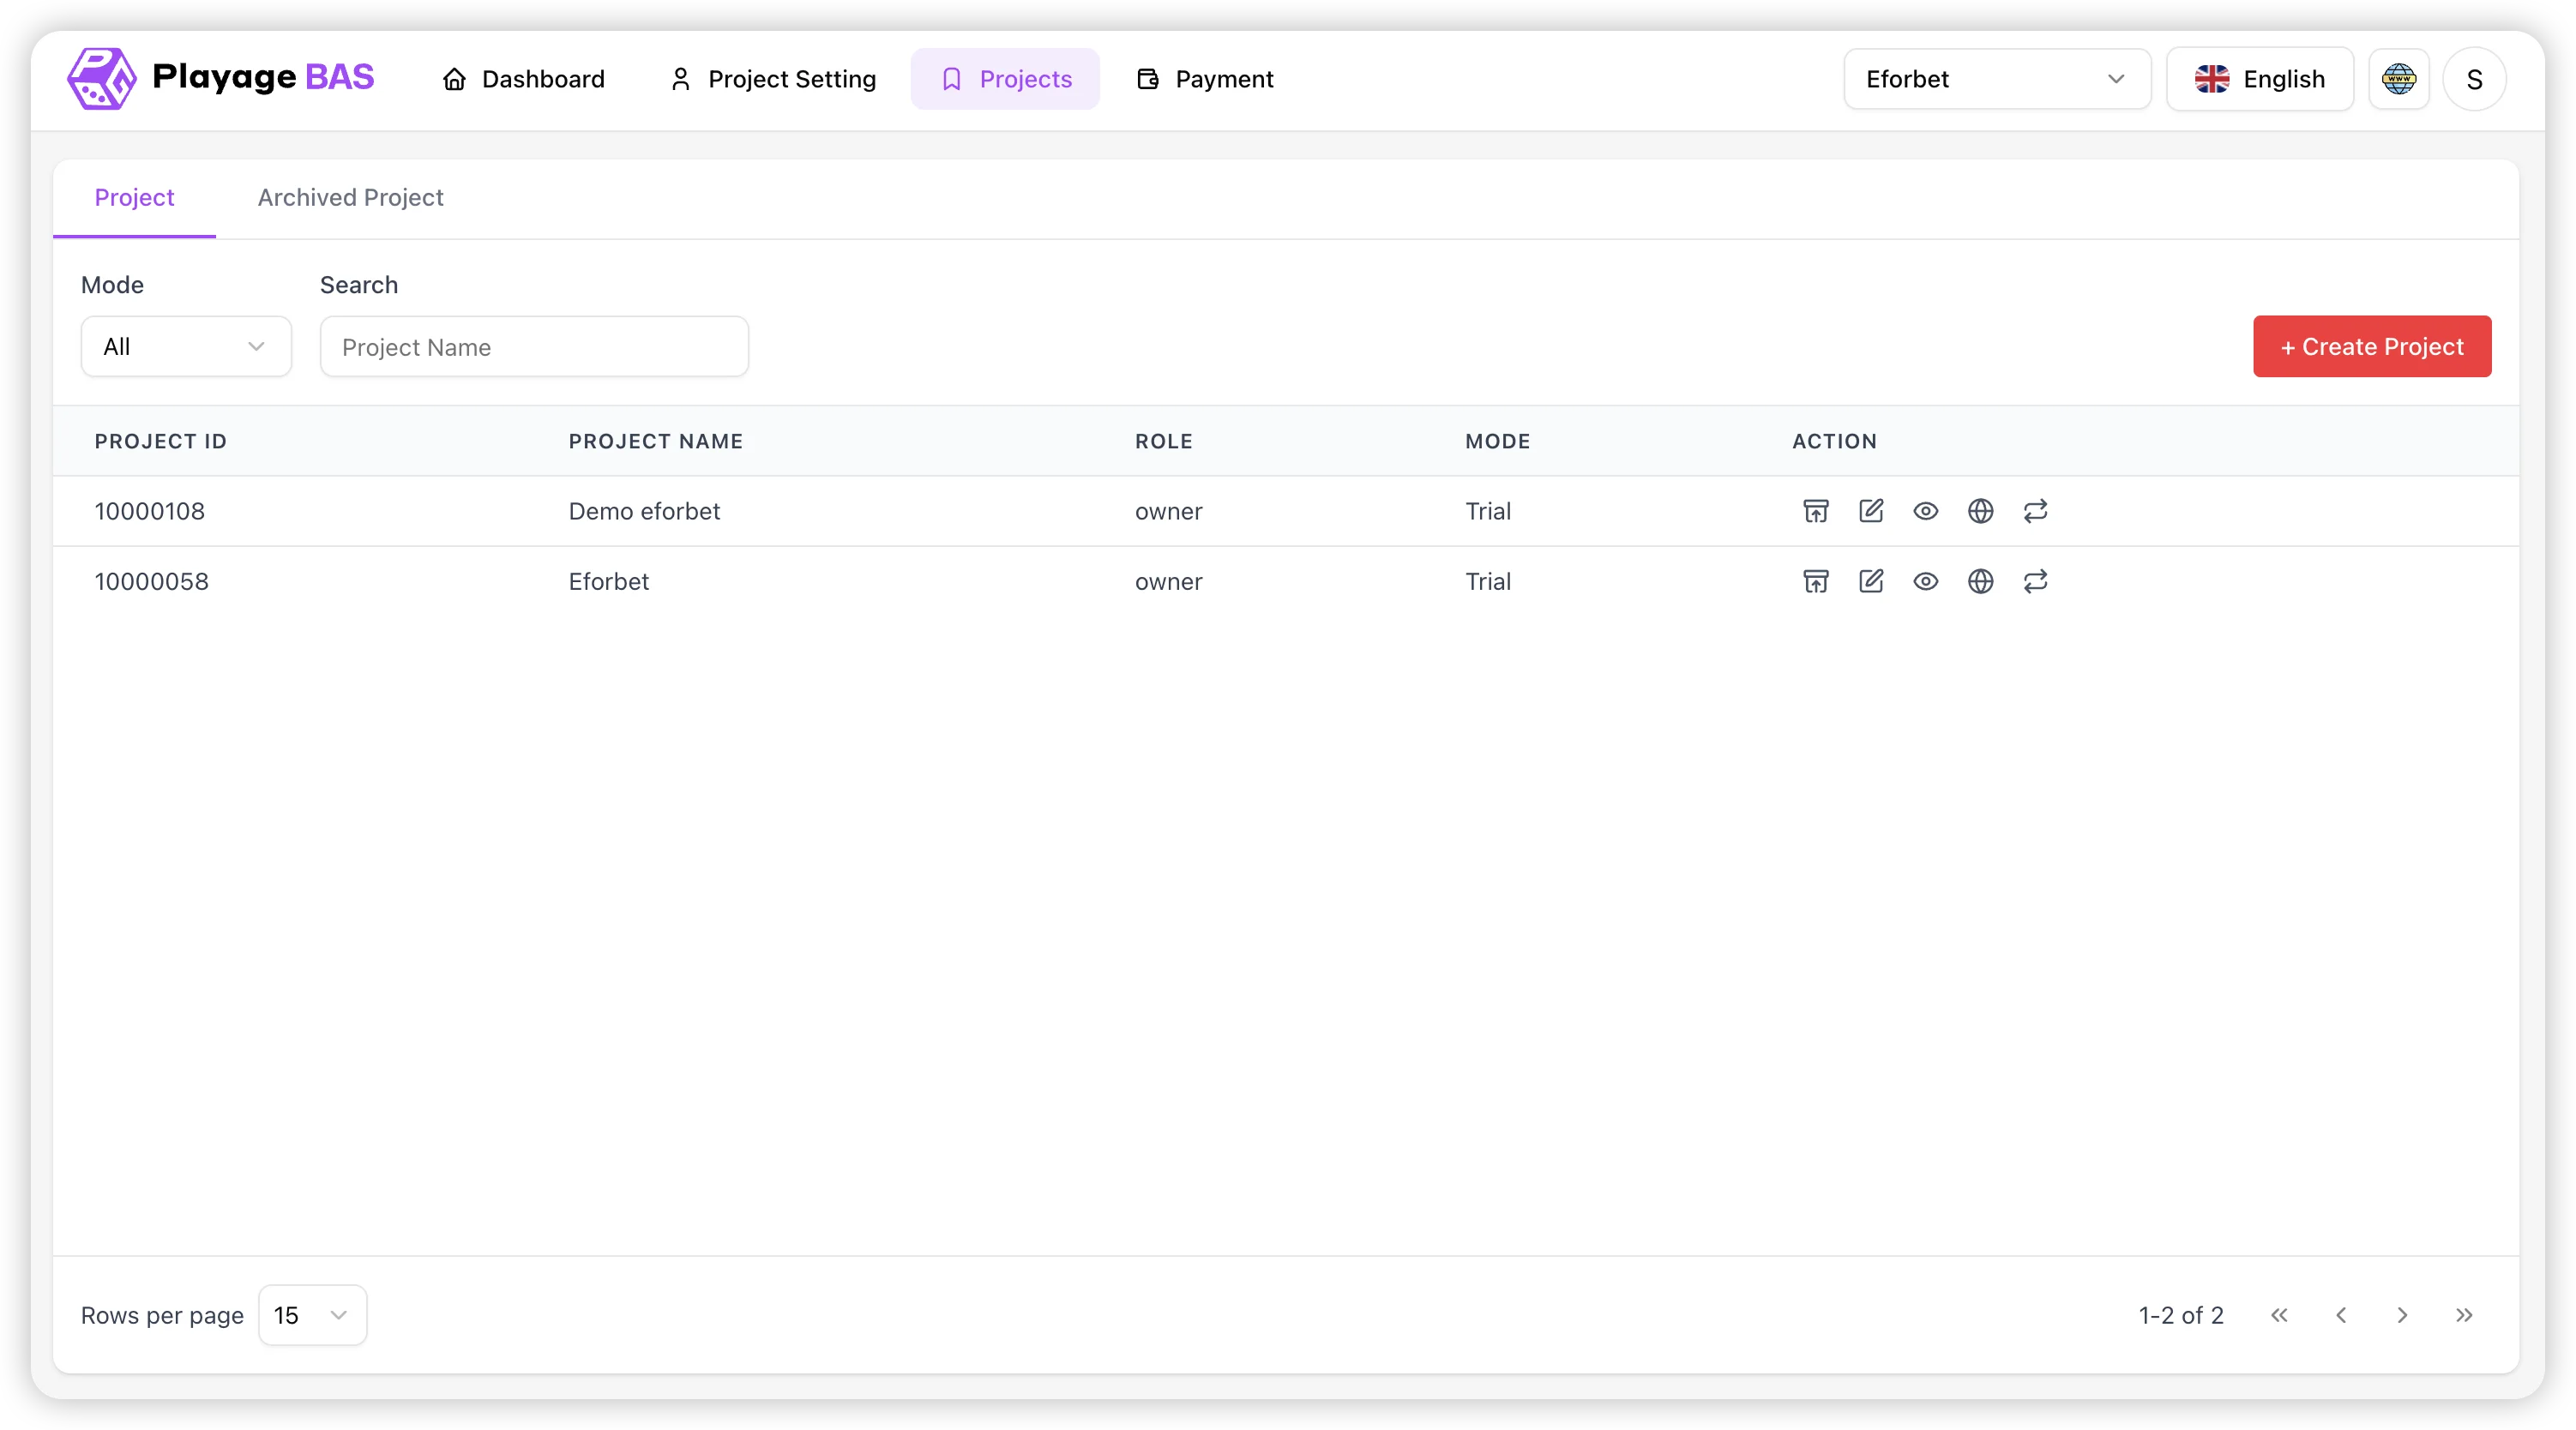
Interface Overview
Main visible sections:
- Tabs:
Project,Archived Project - Filters row:
Mode,Search - Primary action:
+ Create Project - Data table: project id, name, role, mode, actions
- Footer controls: rows per page and pagination
- Top-right controls: project selector, language selector, platform menu icon, profile badge
Column Meanings
| Column | Description |
|---|---|
| PROJECT ID | Unique numeric project id |
| PROJECT NAME | Display name of the project |
| ROLE | User role on that project, such as owner |
| MODE | Environment / operating mode, such as Trial |
| ACTION | Icon-based actions for management operations |
Step-by-Step: Find a Project
- Open
Projectsfrom the left sidebar. - Stay on the
Projecttab for active records. - Use the
Modedropdown if you want to narrow the environment list. - Type part of the project name in
Search. - Review the filtered result row.
- Confirm the correct
PROJECT ID,PROJECT NAME, andMODEbefore taking any action. - Use row actions only after you verify the intended project line.
Action Icons
From the screenshot, the action column exposes these workflows:
| Action | Use |
|---|---|
| Archive | Move the project to archived records |
| Edit | Open project settings |
| View | Open or preview project output |
| Domain Configuration | Open the domain connection and DNS verification flow |
| Refresh | Trigger a data refresh / sync action |
Migrate Domain is covered later in this guide from the dedicated migration workflow video, even though this screenshot mainly shows the core row actions.
Create a New Project
This flow covers both project creation and the first domain setup for the new project.
Video Walkthrough
Create Project Flow
From the video, the current flow works like this:
- Start
Create Projectfrom BAS - Fill
Project Name,Country, andMain Language - Select an
Engine Typetemplate card - Use
Get Startedto finish the project setup - Return to the project list and confirm the new row appears
- Open
Domain Configurationfor the new project - Add the first custom domain with a fresh, unused domain name
- Copy the BAS-generated
Hostand IP values - Create the DNS
Arecord in your DNS provider - Use
Checkto confirm the first domain is connected
Step-by-Step: Create a New Project
- Open
Projectsor useCreate Projectfrom the BAS dashboard quick links. - Click
+ Create Project. - In
General Information, enterProject Name. - Select
Country. - Select
Main Language. - Review the
Engine Typecards. - Click
Selecton the target template. - Click
Get Startedto finish project creation. - Return to the project list.
- Verify the new project row appears with its new project id and name.
Project Creation Field Rules
Project Nameis required.Countryis required.Main Languageis required.Engine Typemust be selected beforeGet Started.- Template cards support
ViewandSelect.
First Domain Setup After Creation
After the project is created, the first custom domain should be configured from the new project row.
- Find the newly created project in
Projects. - Click the
Domain Configurationaction icon for that row. - Click
Connect Domain. - Enter a brand-new domain that has not been used before.
- Do not use a domain that BAS reports as already in use.
- Use a full valid domain name, not a short label like
demoonly. - Click
Connect. - Copy the BAS
HostandDatavalues. - In your DNS provider or DNS management panel, create an
Arecord. - Set
HostorNameto the BAS host value. - Set
Value,Points to, orDatato the BAS IP address. - Save the DNS record.
- Return to BAS and click
Check. - Confirm the first domain becomes
Connected.
Step-by-Step: Configure a Domain
This action is used when you want to connect a custom domain to the selected project from the Projects tab.
Video Walkthrough
Domain Configuration Flow
From the video, the current flow works like this:
- Open the domain action from the project row
- Review already connected domains
- Click
Connect Domain - Enter a valid, unused domain name
- Move to the DNS instruction step
- Copy the
Hostand IP values shown by BAS - Create the matching
Arecord in your domain provider or DNS management panel - Return to BAS and click
Check - Confirm the domain changes from
PendingtoConnected
Domain Configuration Steps
- Open
Projects. - Find the correct project row.
- Confirm the project name and
MODE. - Click the
Domain Configurationaction icon. - In the modal, review existing connected domains if any.
- Click
Connect Domain. - Enter the target domain, such as
demo2.eforbet.com. - Use a fresh domain that has not already been used in BAS.
- Avoid invalid input such as a trailing dot at the end of the domain or a short label like
demoonly. - If BAS shows
Domain already in use, choose a different unused domain. - Click
Connect. - On the next step, note the BAS-generated values in
Host,Record, andData. - Copy the IP from
Data. - Open your domain provider or DNS management site.
- Create a new DNS record with type
A. - Set
HostorNameto the BASHostvalue, such asdemo2. - Set
Value,Points to, orDatato the BAS IP address, such as150.107.188.33. - Save the DNS record.
- Return to BAS and click
Check. - Confirm the status becomes
Connected.
Domain Configuration DNS Fields
| Field | Description |
|---|---|
| Status | Current BAS validation result, such as Pending or Connected |
| Host | Host label you must use in DNS, such as demo |
| Record | Required record type, shown as A |
| Data | IP address the domain must point to |
| Check | Re-validates whether BAS can see the expected DNS record |
Domain Status Meanings
Pendingmeans BAS does not yet see the expected DNS record.Connectedmeans the DNS record matches and the domain is linked successfully.Domain already in usemeans the entered domain is already assigned elsewhere and cannot be reused for this setup.- If the status does not change, review the DNS provider entry and allow time for propagation before checking again.
Migrate a Domain
Use this action only when you are certain about the source and target domains.
Before migration, make sure the target New Domain has already been added from the Domain Configuration flow above. If the destination domain is not connected first, it should not be used for migration.
Video Walkthrough
Migration Prerequisite
Complete this first before using Migrate Domain:
- Open
Domain Configurationfrom the same project row. - Add and connect the destination domain you want to migrate to.
- Verify that the new domain is visible and connected.
- Return to the project row only after the target domain is ready.
Migrate Domain Flow
From the video, the current BAS migration flow works like this:
- Open the
Migrate Domainaction from the project row - Choose the currently active source domain in
Old Domain - Choose the already-added target domain in
New Domain - Review both dropdown values carefully
- Click
Submitto apply the migration
Step-by-Step: Migrate a Domain
- Locate the correct project row in
Projects. - Confirm the project name and
MODE. - Make sure the destination domain has already been added from
Domain Configuration. - Click the
Migrate Domainaction icon. - In the modal, open the
Old Domaindropdown. - Select the current source domain you want to migrate from.
- Open the
New Domaindropdown. - Select the target domain you want to migrate to.
- Re-check both selected values carefully.
- Click
Submitto apply the migration. - Use
Cancelif either domain is incorrect.
Migrate Domain Modal Fields
| Field | Description |
|---|---|
| Old Domain | Current connected source domain to migrate from |
| New Domain | Target connected domain that was added earlier from Domain Configuration |
| Submit | Confirms migration |
| Cancel | Closes modal without changes |
Migration Validation Notes
Old Domainshould be the domain currently carrying the active setup.New Domainshould already exist in the project's connected domain list before migration starts.- If the target domain is missing, go back to
Domain Configurationand add it first. - Use migration only when both domains are already known and you are certain about the direction.
- If the wrong pair is selected, close the modal or use
Cancelbefore submitting.
Archived Project Workflow
Use Archived Project when you need to review records that are no longer in the active tab.
Typical usage:
- Open the
Archived Projecttab. - Search or filter the archived list.
- Review the project before performing any restoration or cleanup workflow supported by the system.
Pagination and List Controls
Rows per pagechanges the visible table size.- Bottom-right controls move between pages.
- On small result sets, the page indicator may show
1-1 of 1or similar.
Safe Operating Checklist
- Search and filter first before using any row action.
- Validate project id and mode before edit or migration.
- Use domain configuration only after copying the exact BAS
HostandDatavalues. - Add and connect the target domain in
Domain Configurationbefore usingMigrate Domain. - Use domain migration only after confirming both domains.
- Create new projects with the correct template from the beginning.
- Review archived records separately instead of assuming active and archived data are mixed.