User List
The User List page is used to create, update, and control Back Office users.
Add User Video Walkthrough
Screen Layout
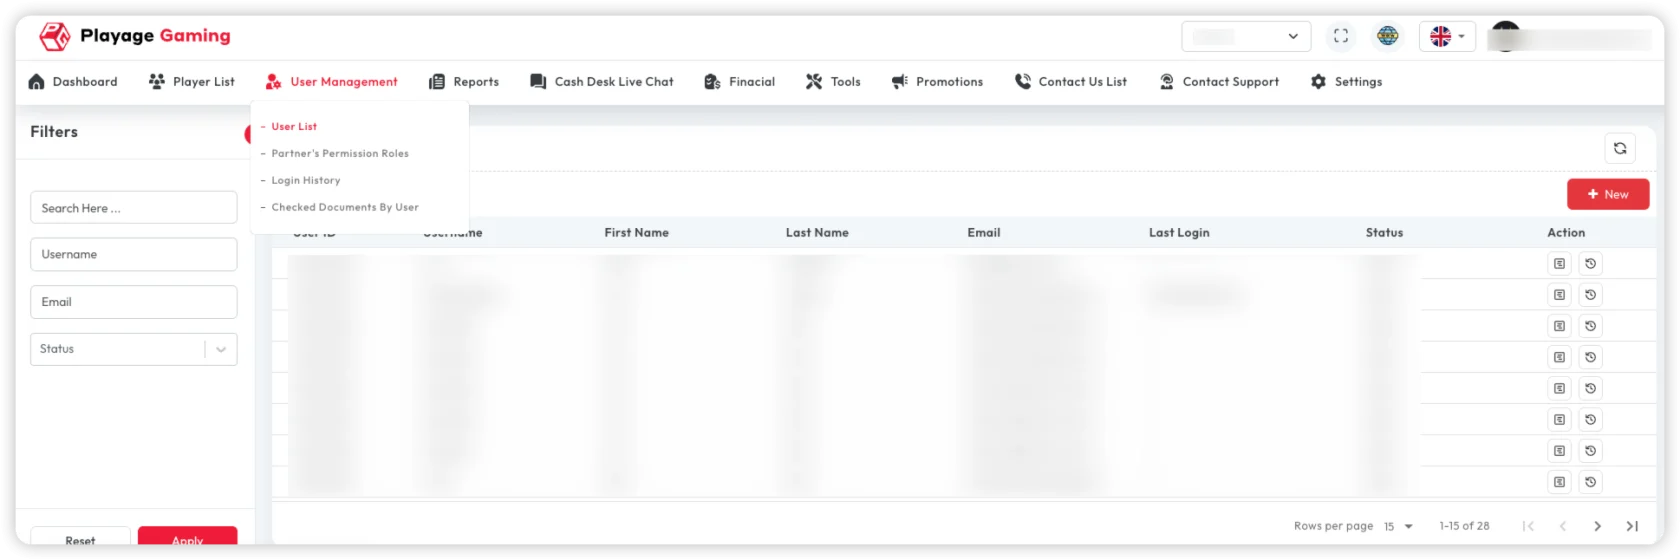
Main areas:
- Search box (name, email, username)
- Status filters
- User table
- Row actions (edit/deactivate/details)
- Add New button
Add New User (2-Step Flow)
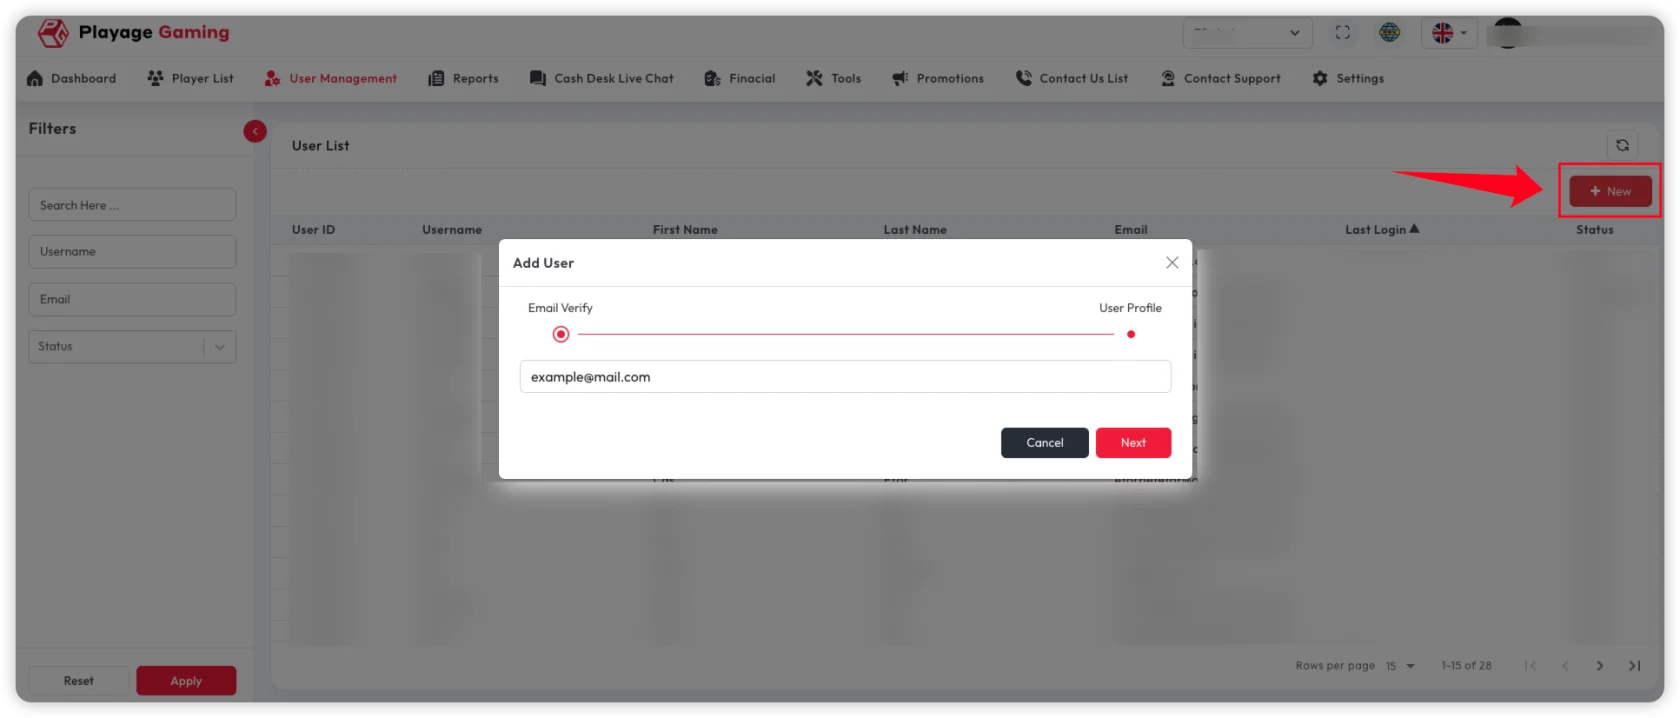
Step 1: Email Verify
- Click Add New.
- In
Email Verify, enter the user email. - Click Next.
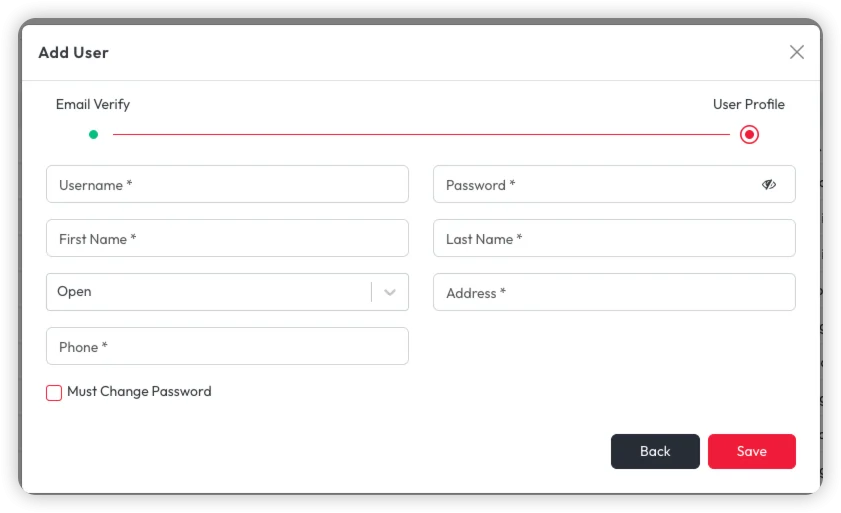
Step 2: User Profile
- Fill
Username. - Fill
Password. - Fill
First NameandLast Name. - Select account status (default shown as
Open). - Fill
Address. - Fill
Phone. - Optional: enable
Must Change Password. - Click Save.
Required vs Optional Fields
Based on the video form (* marker):
Required fields
Email Verifyemail (step 1)UsernamePasswordFirst NameLast NameAddressPhone
Optional fields
- Account status change from default (if policy allows default
Open) Must Change Passwordcheckbox
Field Behavior Notes
Email Verifyis the onboarding gate before profile entry.Must Change Passwordcan be toggled during creation.Backreturns to previous step without saving user.Saveremains unavailable/blocked until required fields are valid.
Manage Existing User (After Creation)
- Open user details from row actions in the list.
- Use the edit icon in
User Infofor profile updates. - Use
Permissionstab for role and module access. - Use
Passwordcard edit icon for password reset/change. - Use
Notestab to add internal comments. - Use
Loginstab to audit recent access.
Profile Modification
Update these fields from User Info edit mode:
Status(Open/blocked state as per policy)First NameandLast NameEmailAddressPhoneMust Change PasswordEmail AuthenticationTwo Factor Authentication
Save with the check icon, or cancel with the close icon.
Access Role and Permissions
From the Permissions tab:
- Click edit mode.
- Search module/permission by keyword.
- Move items between available and granted lists using arrows.
- Expand module groups and select required actions.
- Save changes.
Use Add Role if a new reusable role is required.
Password Change / Reset
From the password section:
- Click edit icon.
- Enter
Password. - Enter
Confirm Password. - Save.
Enable Must Change Password in profile when first-login reset is required.
Add Notes
From Notes tab:
- Click
New Note. - Enter comment in the note text area.
- Click
Save.
Saved notes appear in the notes table with date, username, and comment.
Login Audit
Open Logins tab to verify:
- login date/time
- source/session information (if enabled)
- recent access pattern for troubleshooting
Troubleshooting
- Cannot move to profile step: Verify email format in
Email Verify. - Save button does not proceed: Check required profile fields (
Username,Password,First Name,Last Name,Address,Phone). - User created but cannot sign in: Validate account status and password policy.
- User not visible in table: Clear filters and search by exact username/email.
- Save button does not create user: Check required fields and duplicate username.
- User cannot access expected module: Recheck role assignment and permission toggles.
- Password update fails: Ensure
PasswordandConfirm Passwordmatch. - Permission update not applied: Re-login the target user and verify saved state.
- Notes not visible: Confirm note was saved and filter/sort is not hiding newest row.
Best Practice
- Apply least-privilege role design.
- Keep 2FA enabled for high-privilege users.
- Review inactive users regularly.